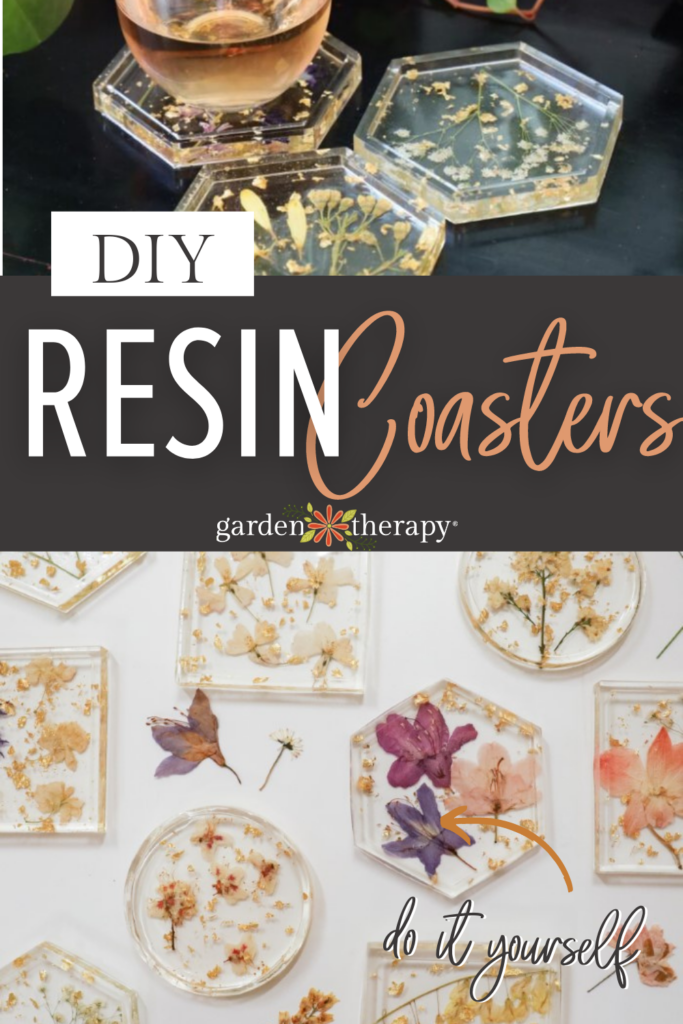
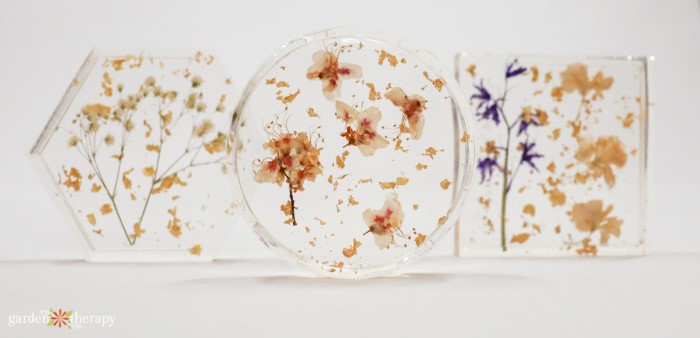
Save a little piece of your garden or even a wedding bouquet by casting the flowers in resin coasters. These coasters add a touch of floral whimsy to your living room and make wonderful gifts to give to new homeowners or as Christmas presents. Learn how to work with resin and eternally save a summer garden!
Hi there! You probably don’t know me, but I’ve been behind the scenes at Garden Therapy for almost six years now! My name is Holly, and I work as the content manager, making sure that all the wonderful posts on the website hit your eyes on time.
Stephanie passed things over to me today so that I could talk to you about one of my favourite hobbies: resin coasters!
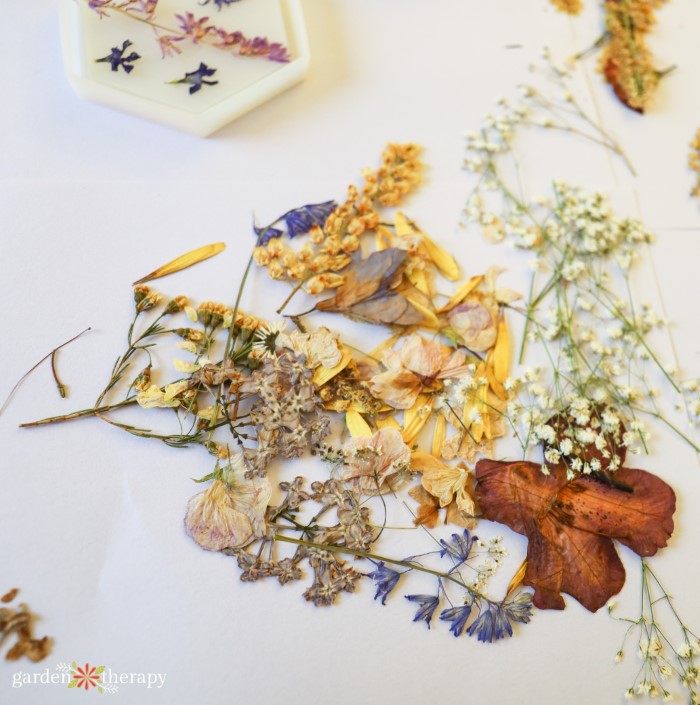
My mother gave me her wooden flower press from her college days, which I’m constantly putting flower finds into. I’ll be the first to admit that I have a flower-pressing problem. It’s simple: I see a flower, and I press it. Therefore, I find myself with an endless number of pressed flowers on my hands.
When I set out to find something to use my pressed flowers in, I came across the art of resin. I couldn’t believe how beautiful the flowers looked, cast in clear resin, with gold flakes and even flower petals sprinkled throughout.
Through trial and error, I learned the ins and outs of resin, which can be a tricky medium when you’re first getting started. But I’m ready to pass that knowledge on to you!
So, if you’re ready to get started, check out how to make these DIY resin coasters below.
This post covers…
- How to Make Resin Coasters With Pressed Flowers
- Materials
- Prep
- Resin
- Pour
- Cure
- Frequently Asked Questions About Resin Coasters
- More DIYs With Dried Flowers
How to Make Resin Coasters With Pressed Flowers
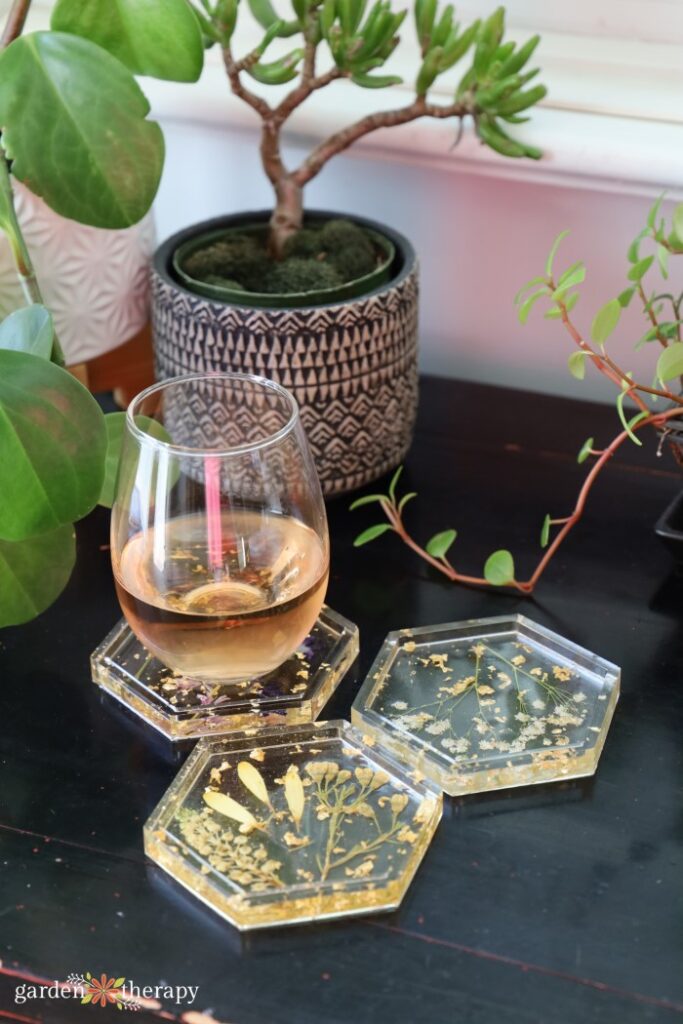
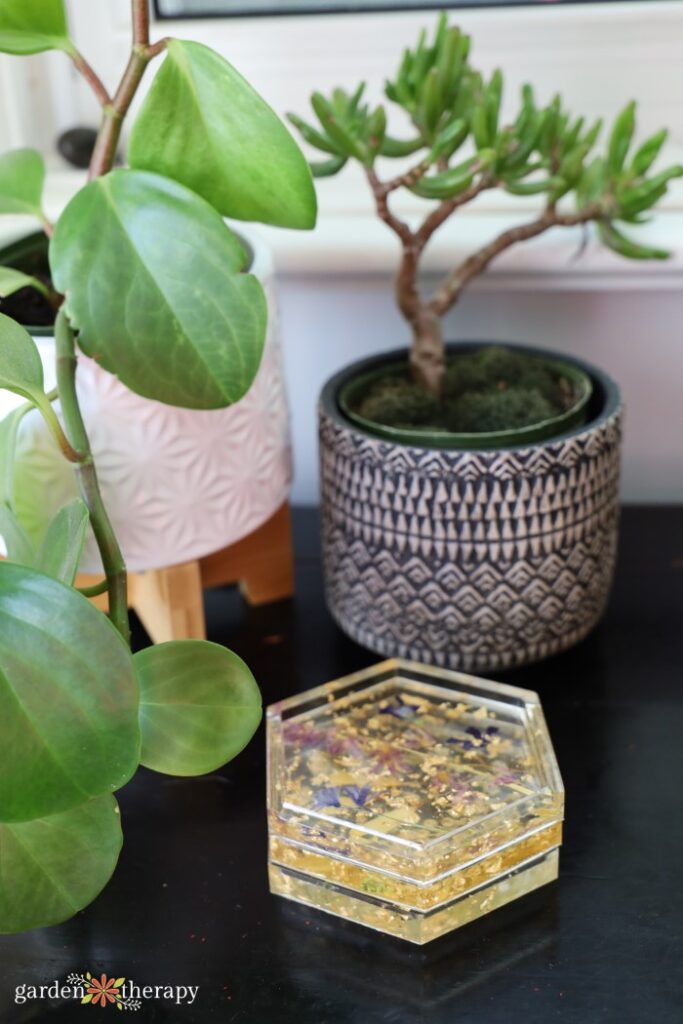
Just about everyone in my life has a set of my pressed flower coasters. They make for the loveliest gifts for housewarming, Christmas, and birthdays. Using pressed flowers from your garden makes the gift that much more personal, too!
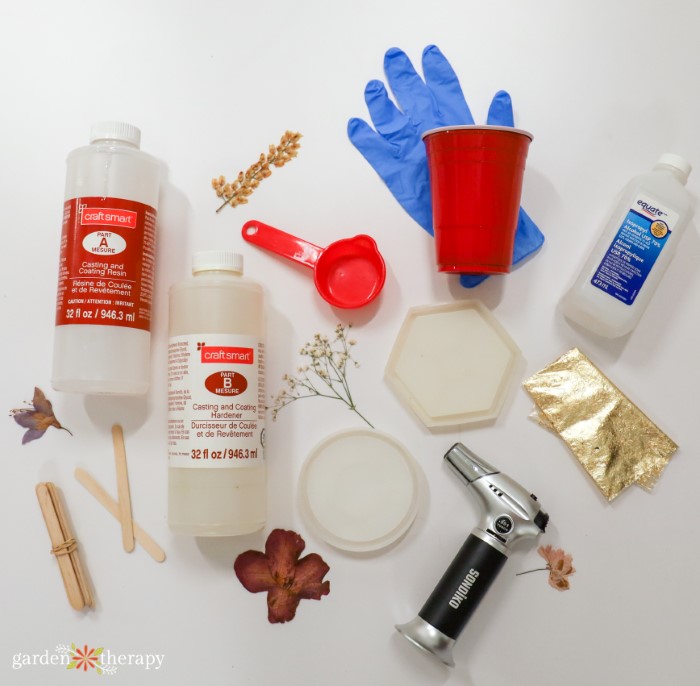
Materials
- Resin
- Coaster molds
- Dried flowers – learn how to dry your own flowers here
- Gold flakes
- Disposable plastic cup
- Popsicle stick
- Gloves
- Scrap paper or newspaper
- Measuring cups
- Isopropyl alcohol
- Butane torch
Prep
Before you get started making coasters, you will want to have all your materials ready to go. Start off by cleaning your coaster moulds under hot water with a little dish soap. If your house is anything like mine, you’ll want to make sure no dog hairs or lint stick to the silicone moulds and accidentally get cast in your resin alongside your flowers.
While the molds air dry, lay out your workstation with newspaper or recycled cardboard. Because resin gets sticky, you want to make sure your surface is protected.
Crush your gold flakes and set aside in a bowl.
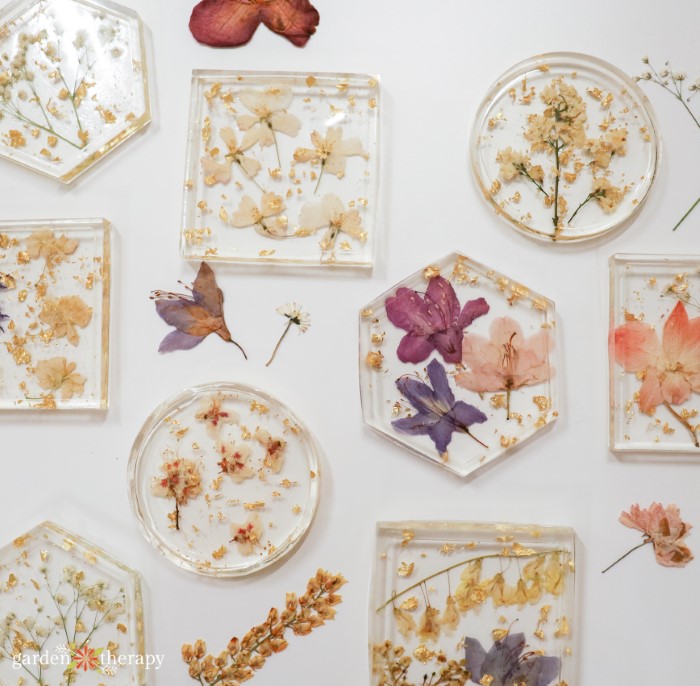
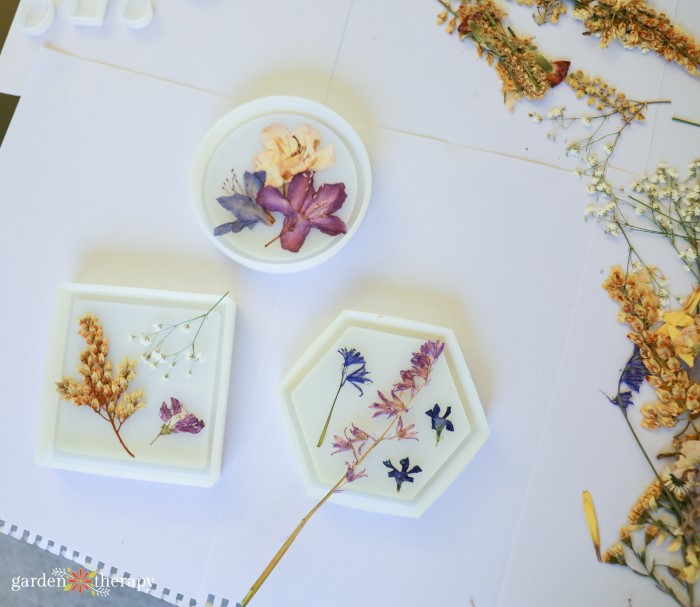
Using your coasters as guidance, lay out your pressed flower design ahead of time. Have fun with overlapping flowers, adding different colours, going in various directions, and cutting stems to fit. Take a picture of your design or set it to the side so you can easily replicate it.
Resin
When you’re ready to get started with the resin, make sure to wear gloves and tie your hair up. The resin fumes can get strong, so you may also want to crack a window.
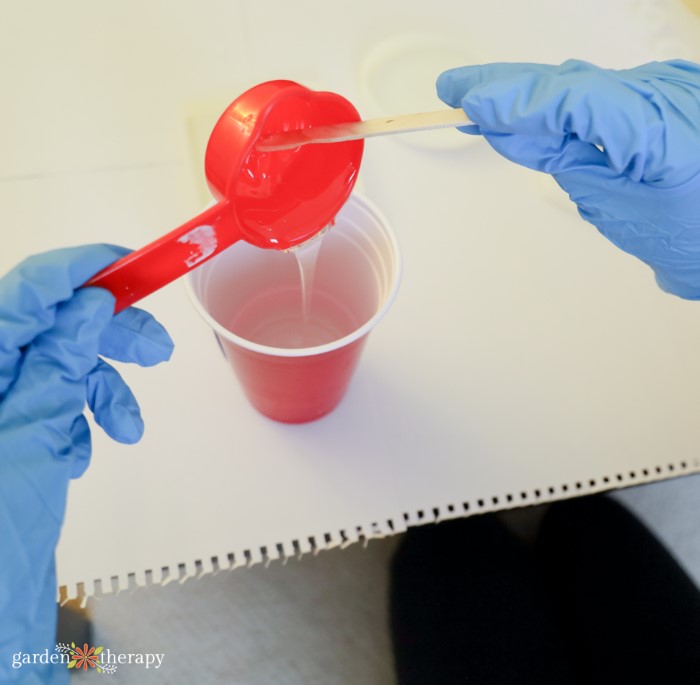
Most resin will come in two bottles, a part A and a part B. Follow the instructions according to the bottle, pour into a disposable plastic container and mix with a popsicle stick.
Typically, you will want to pour equal percentages of each and mix them together. Every coaster mould is different, but I find that ¼ cup of part A and part B are the perfect amounts to fill my coaster moulds!
You want to mix for at least five minutes to fully ensure the two liquids are thoroughly mixed together. Scrape the sides of the container as you mix, and make sure there are no visible swirls in the liquid.
Pour
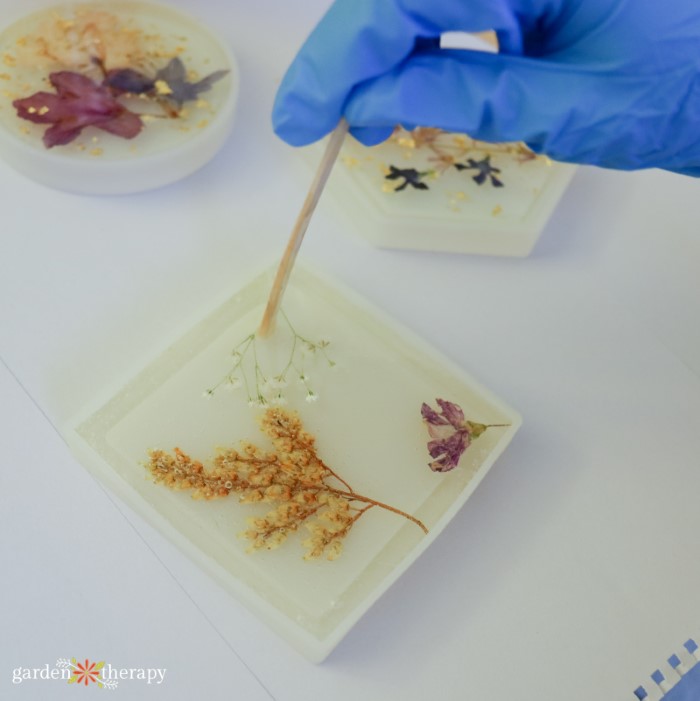
Pour your resin into your coaster, filling only halfway. Take your flowers and place them in your coaster.
Note: most coasters have a ledge around the end, so you’ll need to flip your flowers around to make sure they are facing the right way once they’re popped out of the mould. Pour the other half of the resin over the flowers.
Use your popsicle stick to move the flowers back into place. Add your gold flakes to the design and use the popsicle stick to break them up further and move them into place. You can also add crushed-up dried flower petals for colour.
Cure
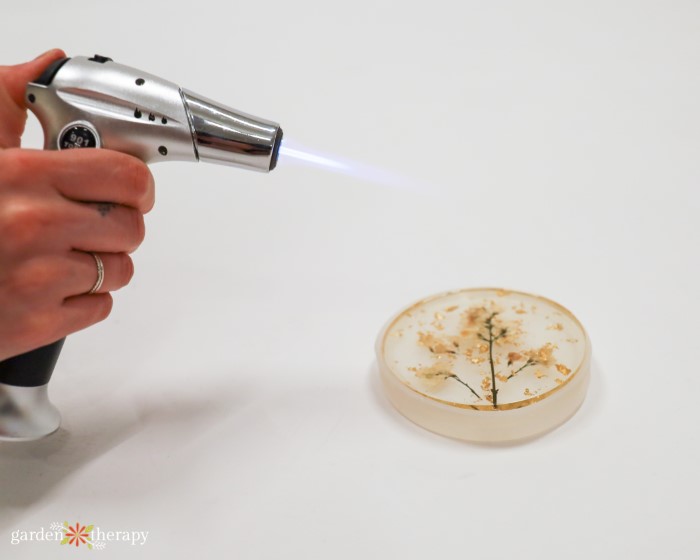
My favourite part is the torch! I use a butane torch (like one you would use for crème brûlée) to help get rid of all the bubbles in the resin. In the first half an hour, while it’s drying, I go over the coasters 3-4 times with the torch. Keep it a fair distance from the coaster so you don’t accidentally burn anything close to the surface.
If you don’t have a butane torch, you can try using a heat gun or barbeque lighter.
Move your coasters somewhere safe where they can cure on their own for 24 hours.
Anything with resin on it will harden, so you’ll have to dispose of your cup, popsicle stick, and paper. You can use isopropyl alcohol to clean up resin before it begins to dry, such as the measuring cup. Resin can dry quickly, so do this step as soon as possible!
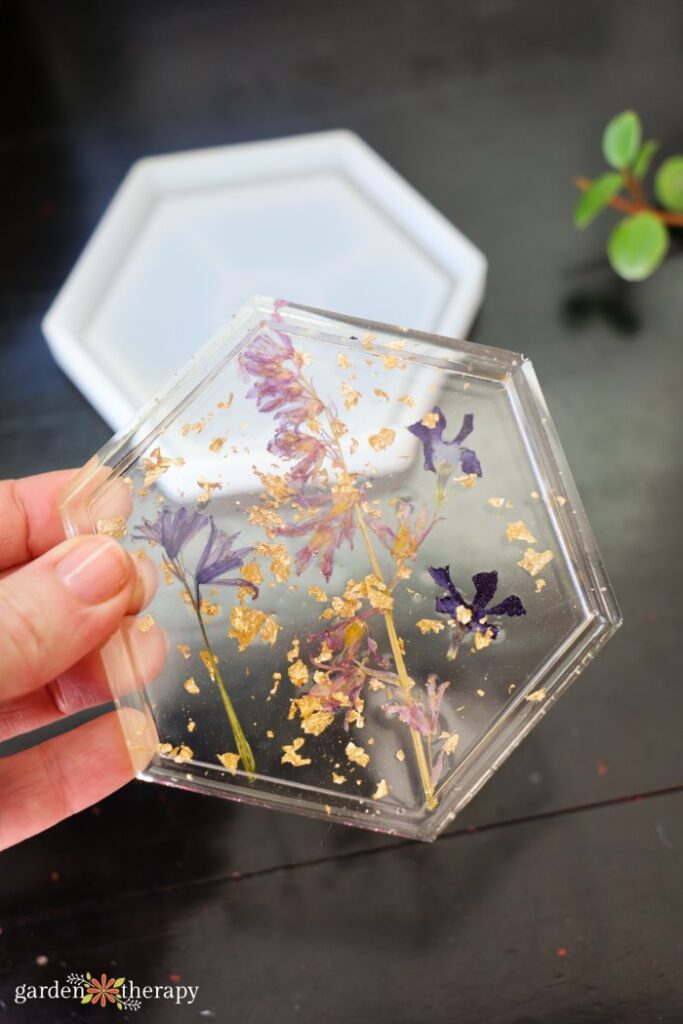
After 24 hours (or less, according to your resin), pop out your coaster from your mould. Enjoy your new pressed flower coasters!
Frequently Asked Questions About Resin Coasters
For resin coasters, you will want to use Epoxy resin. Look for craft resin that’s labelled as clear (others may be more murky or yellow).
I have found that some resin yellows with age, both in the bottle and the coasters themselves. My go-to brand for resin coasters is Craft Smart.
Yes! Epoxy resin is completely heat resistant. I use my coasters daily for my morning tea.
If you only want to make a few coasters, you only need to purchase the resin and moulds to do the project. Both of these are fairly inexpensive and can be easily found at a craft store or online.
Most of the other materials you can find in your homes, such as a disposable plastic container for mixing, popsicles, gloves, and a measuring cup. Pressed flowers can come from your garden or neighbourhood!
The butane torch and gold flakes are optional, but if you plan on making multiple coasters, I highly recommend the investment.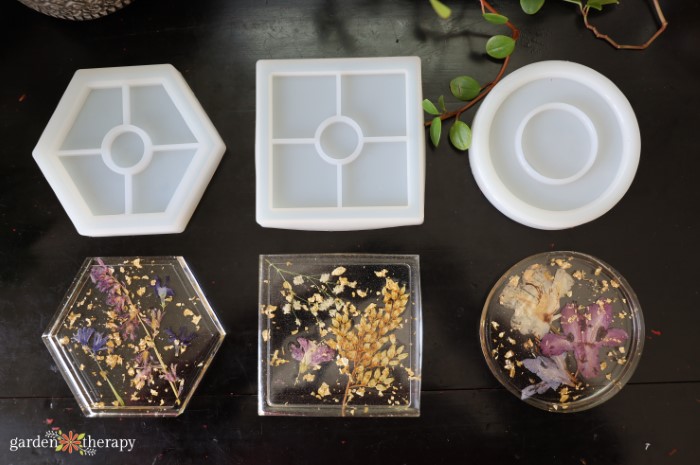
I hope you enjoy making this craft on a lazy afternoon or creative evening. They truly turn out so gorgeous and are well worth the effort!
More DIYs With Dried Flowers
- Woodworking for Gardeners: How To Make a Flower Press
- DIY Herbal Foot Soak
- A Modern Way to Display Pressed Botanicals
- DIY Soap Bars Filled with Herbs, Flowers, and Greenery

Resin Coasters With Pressed Flowers
Equipment
- Rubber gloves
- Measuring cup (1/4 cup)
Supplies
- Resin
- Silicone coaster molds
- Pressed flowers
- Gold flakes
- Plastic cup (disposable)
- Scrap paper
- Isoprophyl alcohol
Instructions
- Clean your coaster molds under hot water with dish soap and let air dry.
- Layout your workstation with scrap paper to protect the surface.
- Use your coasters as a guide and lay out your pressed flower design. Take a picture for reference and set flowers aside.
- Wear your gloves while working with resin. Follow the instructions on your resin to combine parts A and B in a disposable cup. Mix together well with a popsicle stick for five minutes until there are no swirls.
- Pour half your mixture into the coaster mold. Place your pressed flowers in the mold and then pour the other half of the resin over top.
- Use a popsicle to help move your flowers back into place. Add crushed gold flakes, once again using the popsicle stick to move them around.
- Use a butane torch to go over the coasters to help eliminate any bubbles.
- Move your coasters somewhere safe to cure for 24 hours.
- To clean up, dispose of anything with resin on it as it will harden. Use isopropyl alcohol to clean up resin such as surfaces and the measuring cup.
- After 24 hours, pop your coaster out from its mold. Enjoy!